
COSMETOLOGY FOR CAR FRONTS
Molded plastic and urethane have allowed designers to become creative with the coverings for vehicle front and rear bumpers. These coverings, known as fascias, can be manufactured in virtually any shape and color, and add interesting design cues to the modern automobile. However, with molded plastic and urethane, minor scratches, cracks and even breaks can happen during day-to-day driving. There are a few options to consider when bringing fascias back to their original pristine state.
Types of Material
The first step in plastic repair is identifying the type of plastic. Plastic materials can be classified into 3 distinct groups: (1) rigid, (2) semi-rigid and (3) flexible. The most common material used for fascias on FCA US LLC vehicles is TPO, or thermopolyolefin, and it is classified as a flexible plastic. This is the material used for front fascias on minivans.
While the repair procedure for all 3 categories of plastics is basically the same, the material used for the repair can differ. The repair material is specific to the type of plastic. When flexible plastic fascias are being repaired, a flexible plastic repair material must be used.
Types of Damage

The first step in repairing a damaged fascia is determining what needs to be done. Ask yourself if it’s possible to restore the part to its original strength and appearance without exceeding the value of the replacement part. Remember, FCA US offers a core fee for damaged fascias. This must be subtracted from the value of the part. The damaged area will have to be painted in addition to being repaired. Take a look at how much total time will be involved to make sure that the cost of repair does not exceed the cost to replace. Some fascias come finished in the original color.
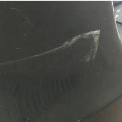
Plastic materials can mask the severity of an accident. Inspect the damaged area closely to determine how bad the damage really is. Next, identify the type of damage. The simplest plastic damage is a scuff or scrape. These are the types of abrasions that can occur if the vehicle rubs up against the door jamb of a garage or scrapes against the base of light pole in a parking lot. This type of damage is very common and not too difficult to repair.
A fascia that has been cracked and punctured can be repaired, but it will take some work. The cracked sections can be aligned and backing material can be applied to the back. Also, the small puncture can be filled. Remember, if there are spider web cracks, or a tear, this damage must be stopped or removed. If they cannot be stopped or removed, the fascia must be replaced.
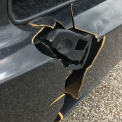
When the damage is severe, there is no other option than to replace the fascia. If an entire section has been broken away, there is no practical way to repair this damage without replacing the fascia.
The repair job is simplified by removal and repair in the shop. Fascia replacement often requires removal and re-installation of the radiator, oil cooler and air conditioning condenser.
Repairing Fascia Damage
When plastic parts, such as fascias, require repair work, it is recommended that the part be left on the vehicle if possible. You’ll save time if you keep the fascia installed on the car and the part remains stationary when you’re fixing it. If you remove it, you must ensure proper alignment when it is re-installed. Improper alignment can add stress to the repaired area, which can lead to future failure. This is especially true with a flexible plastic part.
A damaged part that is cracked or punctured must be removed from the vehicle to repair it. Patching on the back side would be required and that can’t be done with the fascia on the car. Pay attention to detail when re-installing this part to minimize the alignment and potential stress issues.
Some damage (such as scuff marks) is more cosmetic than structural. Often, a combination of rubbing and polishing compound is enough the remove scuff marks and paint. If the scuff marks are deep, more extensive work is needed.
For areas of damage that have not penetrated through the fascia, dish out the repair area with 120 grit sandpaper. Wipe dry with a clean, dry cloth. Fill the dished out area with the repair adhesive (check the directions to determine if an adhesion promoter is necessary). Always build up the repair adhesive higher than the surrounding, undamaged area.
After the adhesive has fully set, slowly rough sand it with 120 grit sandpaper. Remember, keep the surface cool. Finish sand and contour the area with 180 grit, then 220 grit sandpaper. Prime and paint according to the approved refinish paint manufacturer’s (AkzoNobel, Axalta, BASF, PPG, Sherwin-Williams and Valspar) instructions.
If the damage extends through the fascia, a piece of fiberglass reinforcement must be attached to the backside of the part. It is usually helpful to cut out the damaged area and bevel the edges of the opening about 20 degrees. This gives you a larger bonding area on the front side. Next, rough sand the backside of the fascia with 120 grit sandpaper. Cut a piece of fiberglass reinforcing material that will extend about 1 inch beyond the repair area.
Using the repair adhesive, attach the reinforcement to the backside of the fascia. Add a second piece on top of the first in an X shape. Apply additional adhesive to completely cover the reinforcing material. Allow the adhesive to fully set before proceeding.
After the adhesive on the backside of the fascia is set, you essentially have a dished out area the must be repaired on the front side. Simply follow the procedures for repairing fascia damage that does not extend through the part.