GET MORE POWER OUT OF YOUR 6.2L SUPERCHARGED MOPAR® VEHICLE PART 3 – Pulley
5 years ago How-To
Give It ALL The Boost
The next step we are taking in our SRT® Hellcat/Demon/Redeye mod series is getting more boost from that glorious supercharger. Again, I have to say upfront, if you care about your warranty, run away from this page as fast as you can.
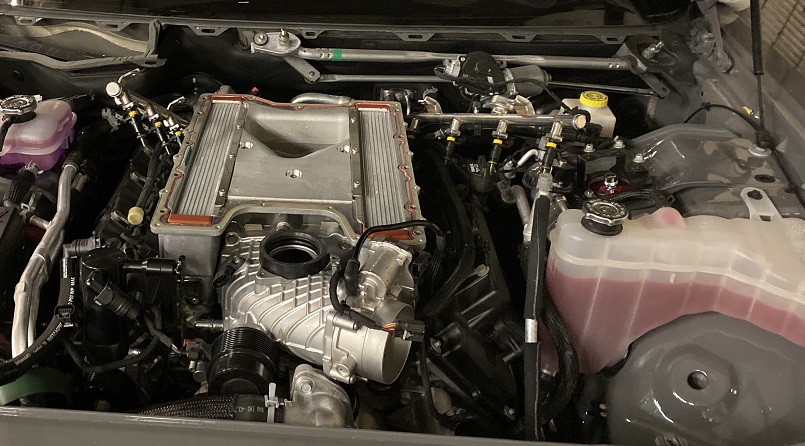
Lets get started. To get more boost out of your factory supercharger, you need to start with the steps outlined in the PCM removal article. We will be removing the supercharger, and to do that you must complete the same steps mentioned in the previous article. The way to get more boost is to drive the supercharger faster. This can be done by installing a smaller drive pulley on the supercharger, or a larger crank pulley on the motor. Today we are installing a smaller supercharger pulley, often referred to as “Upper only”.
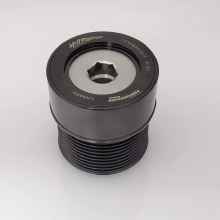
There are a variety of companies that offer supercharger pulleys, but the one that is best for you and your goals should be discussed with your tuner. In this case we are going with a Litens Hellraiser 2.72” pulley. It is made by the same company that produces the stock supercharger pulley and functions the same way, decoupling when not under load. It functions like stock, but makes more boost and that’s my kind of party!
The first step will be removing the wiper cowl and strut brace as outlined in the PCM article. Next we will be unhooking all components attached to the supercharger so that it may be partially removed from the engine.
Lets start with the air filter and intake tube. Loosen the clamps on both ends of the intake tube and remove the bolt holding the filter housing. The filter housing simply pops out by pulling up after the bolt is removed.
With the filter and intake tube out of the way, remove the throttle body connector and harness, as well as the small vac line. The push pin pry tool works great for this.
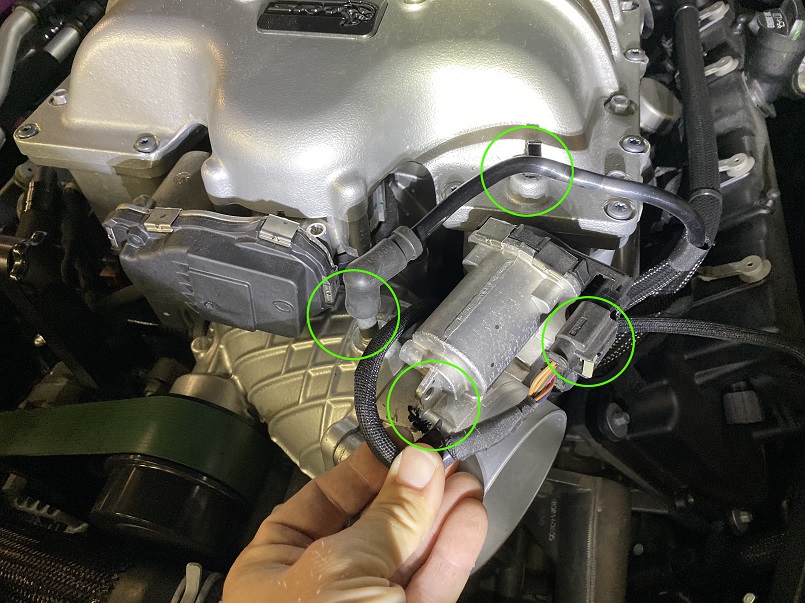
Next we will unhook the driver side MAP sensor from the side of the supercharger.
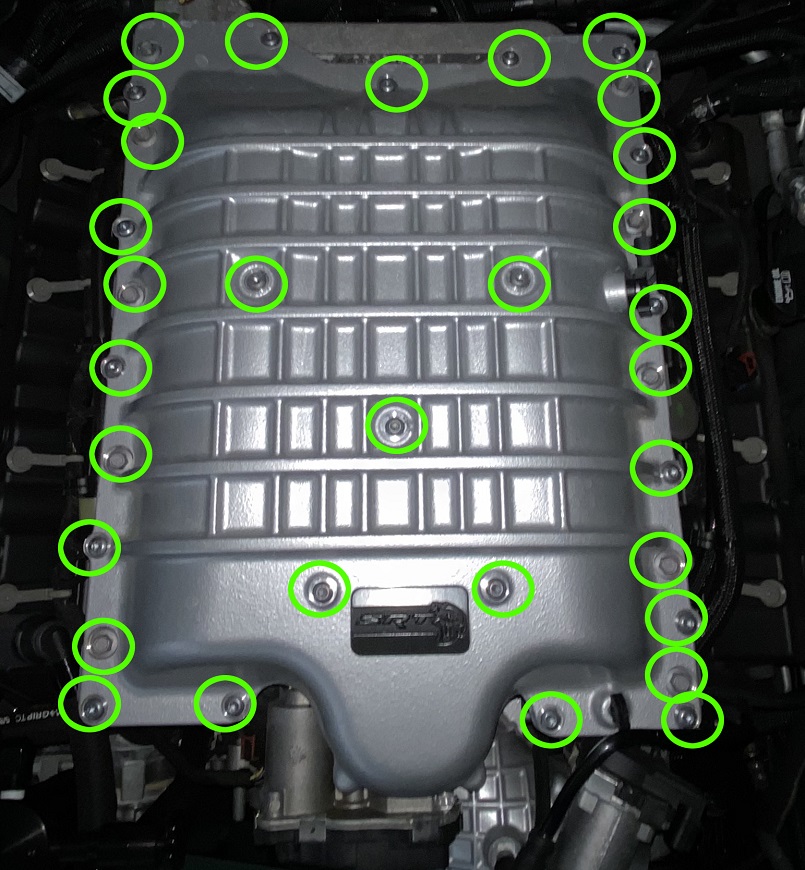
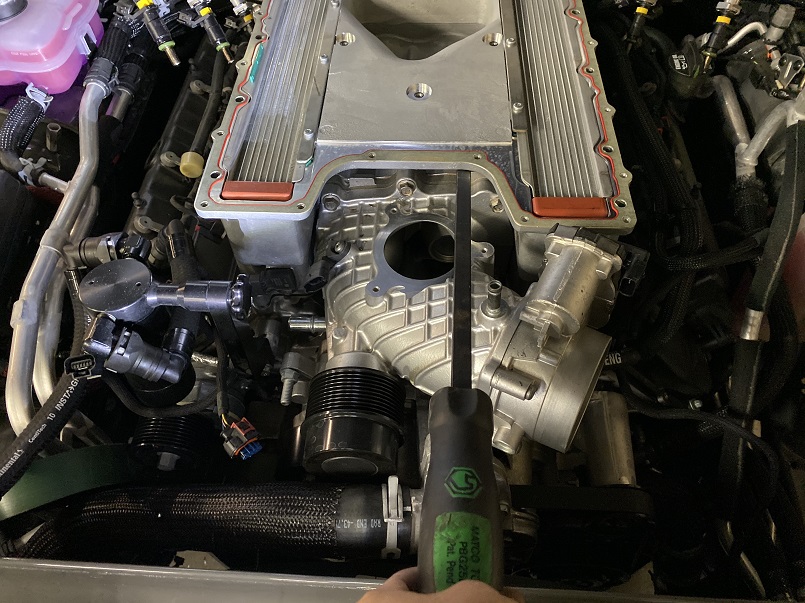
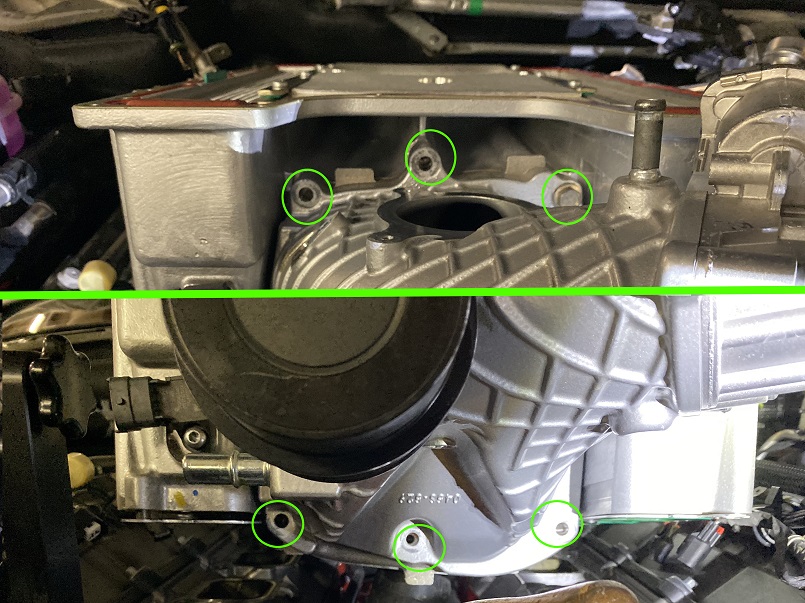
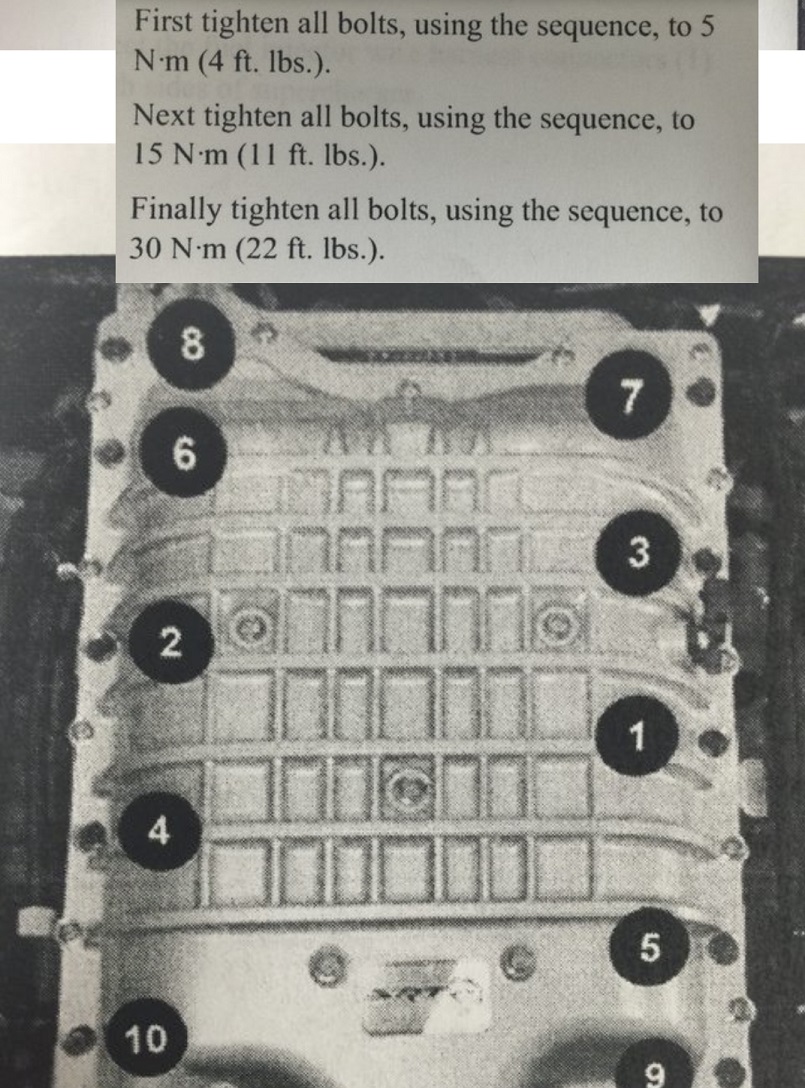
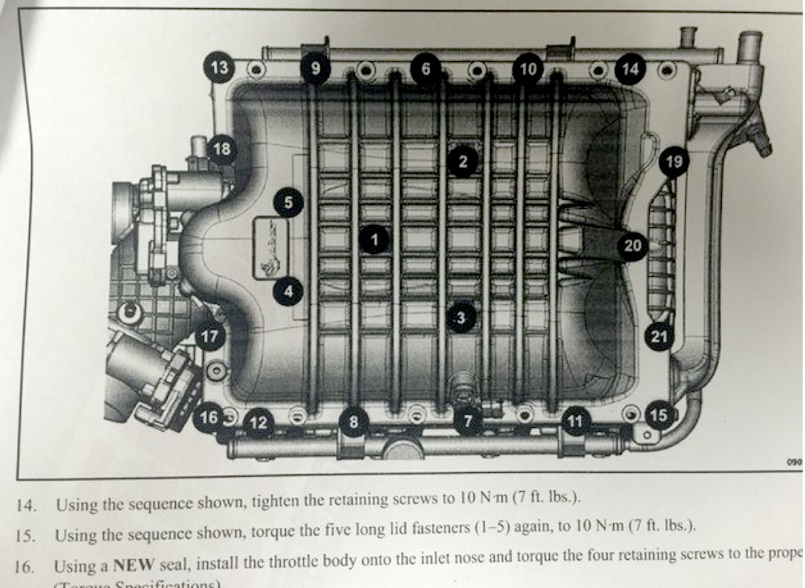
Remove all bolts from the supercharger lid, there are three types. One set of long bolts hold the supercharger to the motor with a 10mm head. The other 5 are torx heads, located in the center of the lid, holding the lid to the supercharger.
Remove the connectors for the MAP sensors on the passenger side of the supercharger, as well as the connector for the bypass valve and the harness clip behind it. Don’t forget, there is also a disconnect hose that connects at the bottom of the supercharger snout from the PCV valve on the passenger side valve cover.

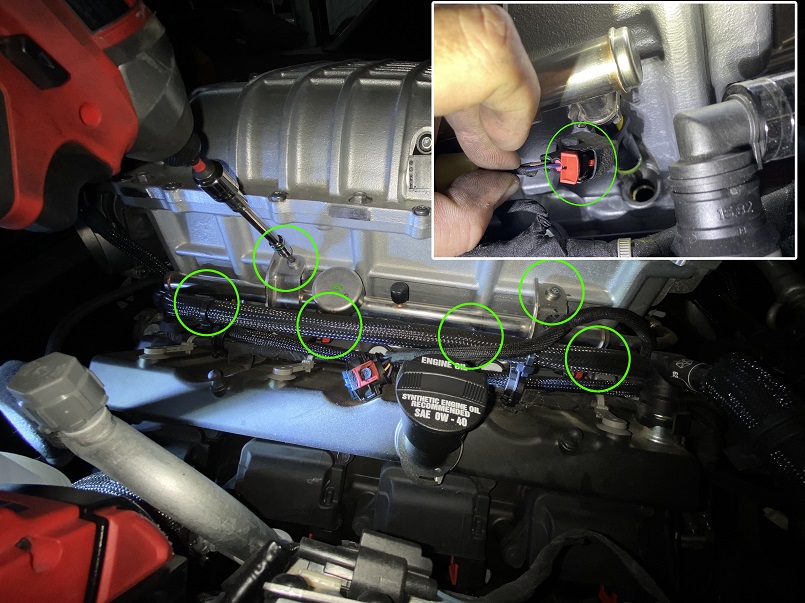
Remove the two Torx bolts from both the driver and passenger side fuel rails, and unclip the 4 fuel injector connections on each side. You can then carefully and gently move them out of the way of the supercharger.
Now using a 15mm wrench, loosen the supercharger drive belt tensioner and remove the belt from the supercharger pulley.

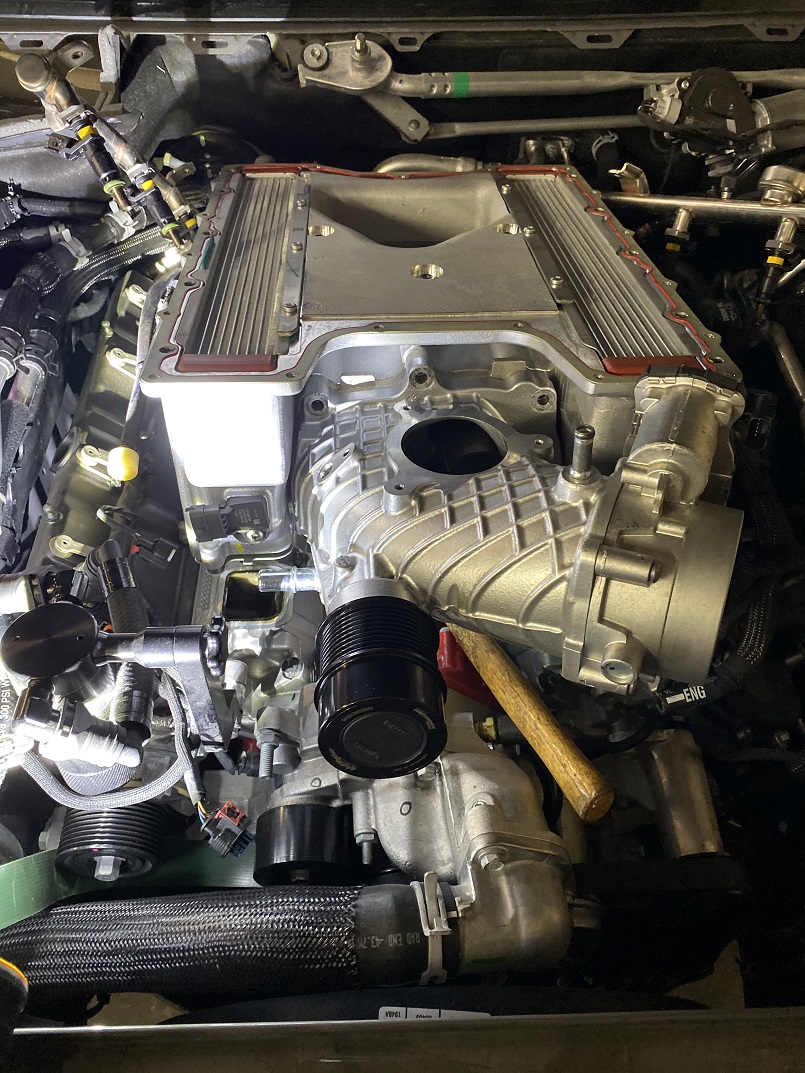
Remove the lid from the supercharger carefully, making sure not to damage the gaskets underneath the lid. Also make sure the small o-rings in the center of the supercharger stay in their place.
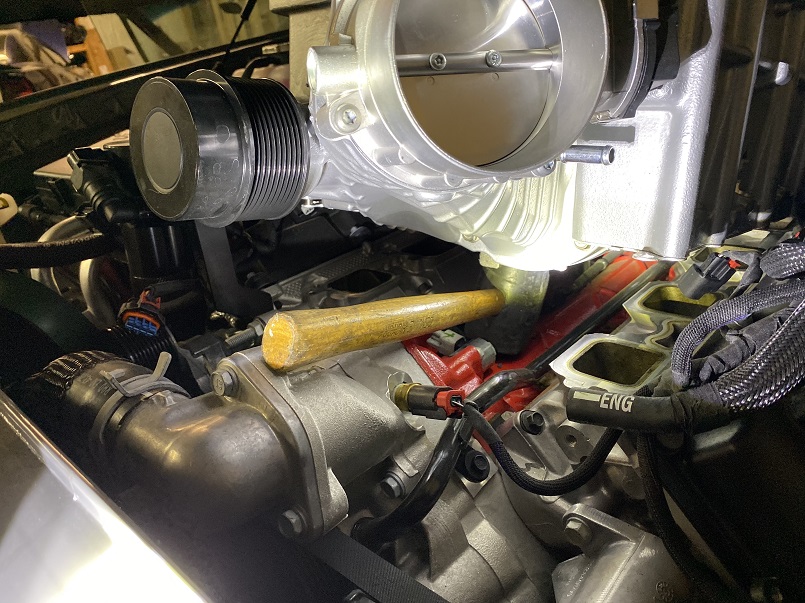
Double check that you have nothing attached to the supercharger assembly aside from the fuel coolant lines in the rear. We are now ready to lift the supercharger. We will be lifting the front side of it and propping it up. I like to use a rubber mallet as my prop so that nothing is scratched during the install.
Use a pry bar to lift the front side of the supercharger about 6” off the engine.
Place your prop under the supercharger, making sure not to let it rest on anything on top of the motor.
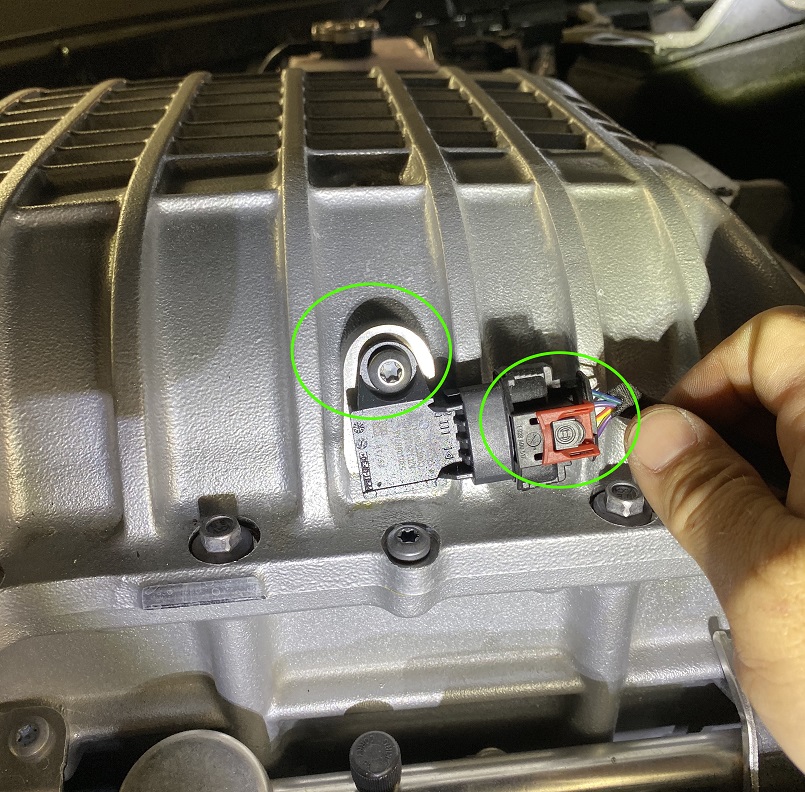
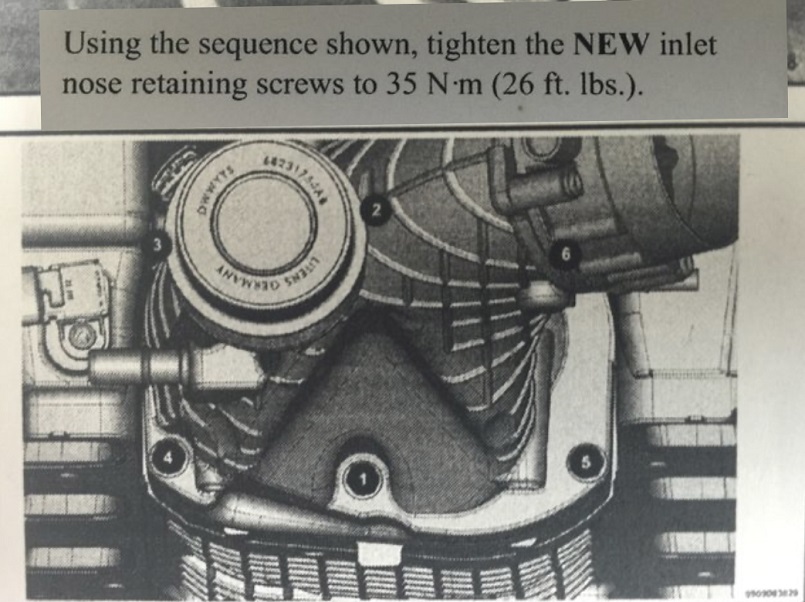
Now that we have it propped up we have access to remove the snout from the supercharger. The first step for this is removing the bypass valve port by removing the 3 Torx bolts holding it on, as well as the MAP sensor.
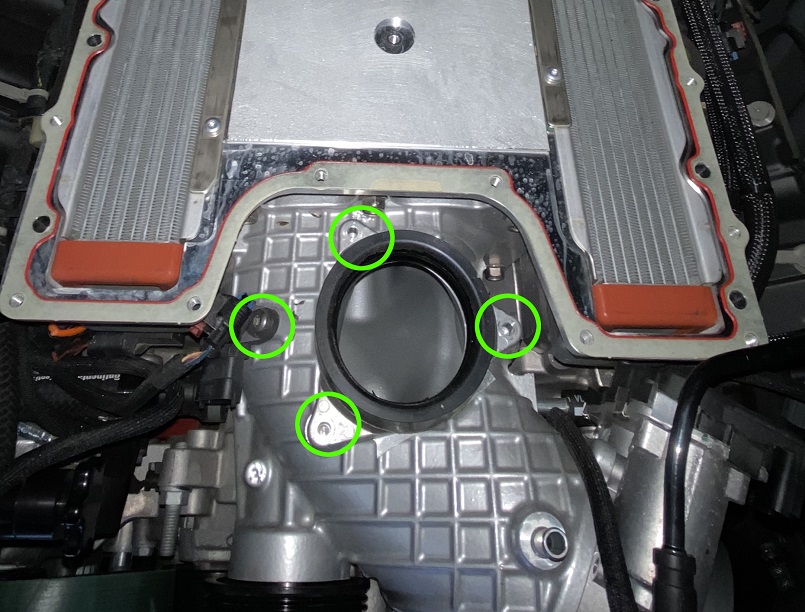
We can now remove the 6 bolts that attached the snout to the supercharger. The top right bolt may require a swivel adapter to get in there.
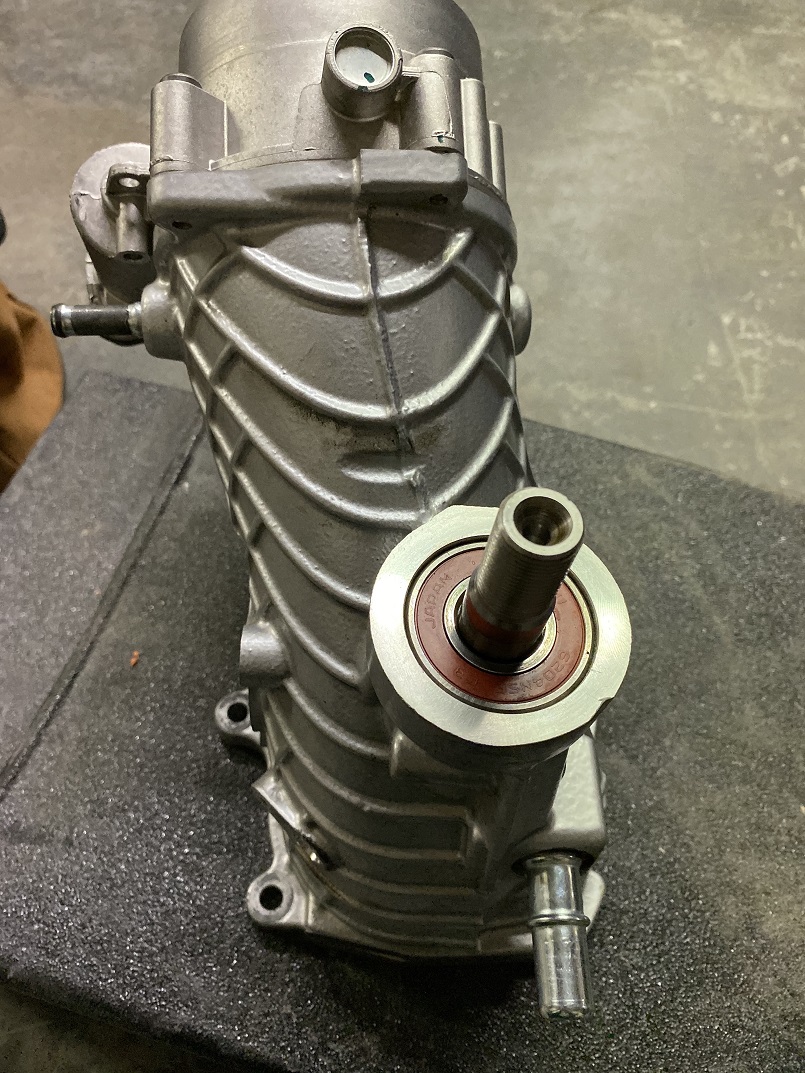
You can now fully remove the snout from the supercharger. It may take a little wiggle side to side and back and forth, but don’t worry, there is nothing holding it on anymore. Sometimes they pop off easy and sometimes they take some massaging.

Now we need to remove the stock pulley from the snout. The first step is to remove the tamper proof dust cap. You can try to remove this without damaging it, but it doesn’t really matter as it’s not reused. Pry the cap off with a slim pry tool or screw driver.

You will need a pulley removal tool kit for this next part. I recommend the Demon/Hellcat Pin tools and Hex insert from AAD Performance. It will work on any of the 6.2L superchargers. The hex insert goes into the end of the pulley, and the pin holding tool goes on to the back side of the pulley shaft to hold it in place. It is doable with two break bars, however a good strong impact works well too. The pulley loosens counter clockwise.
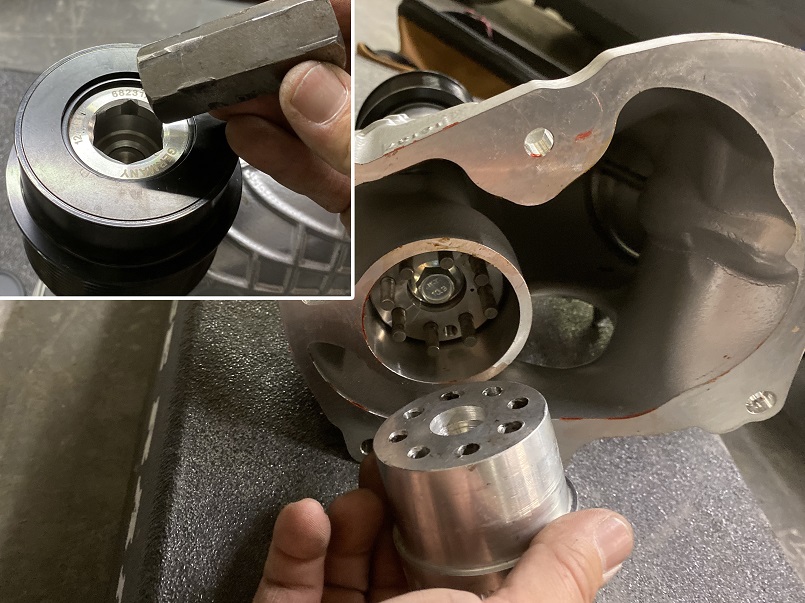
With both tools in place, loosen the pulley and remove it from the snout.
Now that the pulley is off, we inspect that there is no damage to the thread on the shaft or to the bearing.
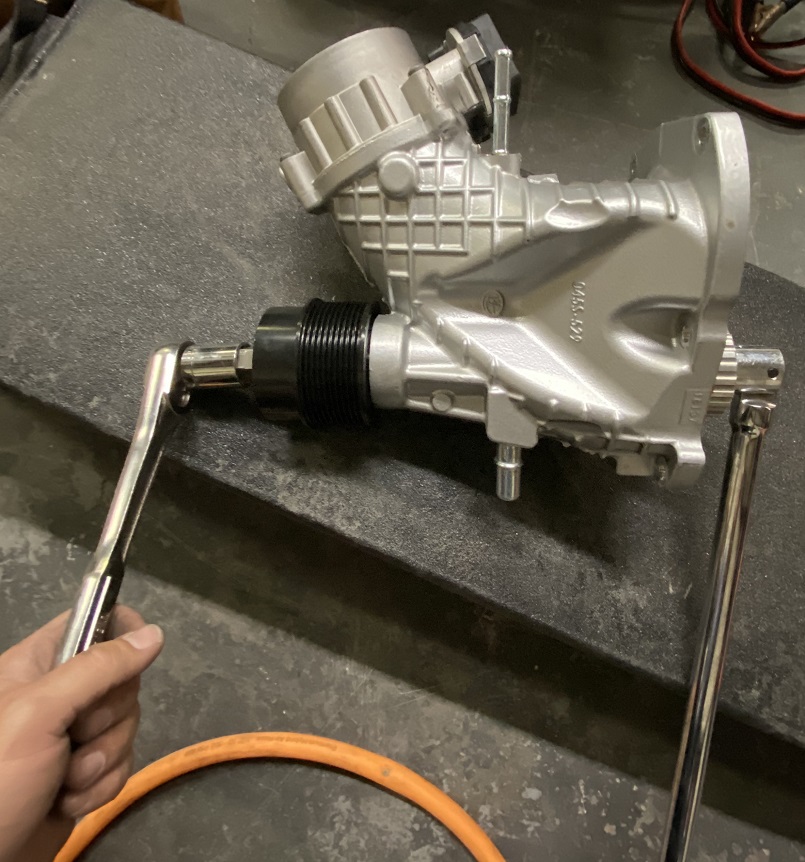
Now we install the new 2.72” Litens Hellraiser pulley as per the instructions that came with the pulley. Please refer to the pulley manufacturers instructions for torque specs or installation details as each is done slightly different.
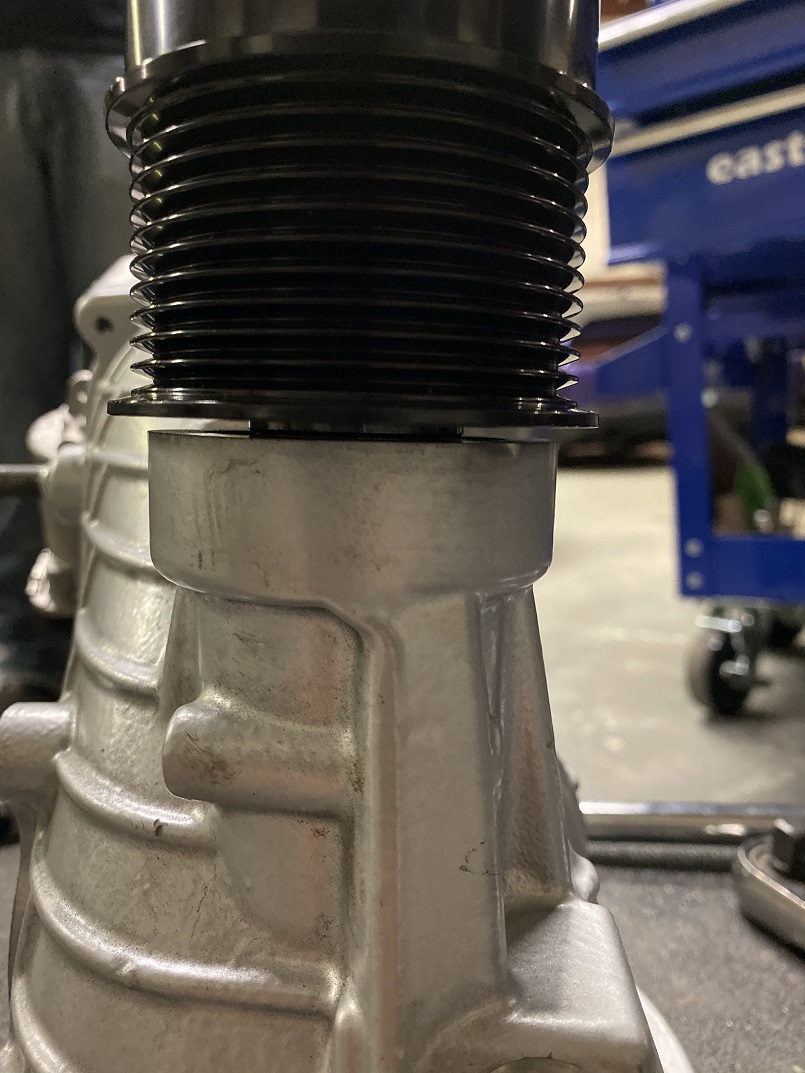
Verify the new pulley is torqued appropriately and does not come in contact with the face of the snout. We are now ready to install the snout back onto the supercharger and re-install everything in reverse order of how we removed it.
There are some FCA specific procedures here regarding attaching the lid to the supercharger and the supercharger to the engine as well as the snout to the supercharger. Note- On the Demon/Redeye motor, you need to apply red anaerobic gasket maker around the face of the bearing plate on the supercharger. The Hellcat supercharger has a factory fiber gasket that is reused.
Remove your prop from under the supercharger and carefully set it back into place, pay attention that nothing gets pinched between the supercharger and cylinder heads and that it lines up correctly. Place the lid back on and follow the listed procedure to torque all the bolts back to factory specs.
Wrap up putting everything back together that you removed, install your new and shorter supercharger belt, load up your custom tune from your favorite tuner and let the new found ponies run!