How To: Change a Wiper Blade
Part of the fun of being a vehicle owner is keeping your car-of-choice running smoothly and looking great. And we at DodgeGarage want to teach you how to do some of the tasks yourself! Check out the video that demonstrates how to change your wiper blades when needed:
You don’t need any tools for this! Nor do you need to remove the wiper arm from your vehicle. But in case your specific circumstance requires you to remove it, keep reading, because we’ll go over that too!
But first, the non-detach steps:
Once you’re situated at the blade you want to work on, locate the tab and pop it up. (If yours is fitted tightly into place, you can use a flathead screwdriver to give you more leverage.)
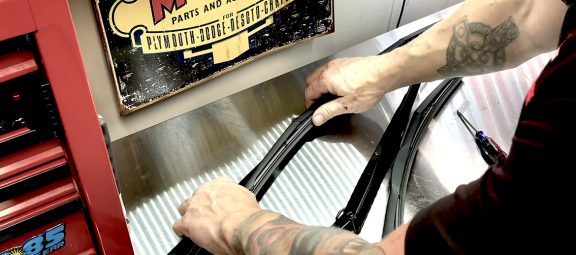
From there, slide the wiper blade piece toward the part of the arm that secures to the vehicle. Doing this will simultaneously allow you to push the metal piece of the wiper arm out of place (toward the wiper blade).
Once the connection is undone, rotate the blade to be perpendicular to the wiper arm so you can separate the two pieces. Some wiggling may be needed to fully pop out the wiper blade!
To install your new wiper blade, you pretty much repeat the process in the opposite order. Take your new wiper blade and place the metal hook perpendicular to the housing on the wiper arm. Stick it in and rotate the two pieces back together, ensuring they are as flat against each other as you can get them.
Then slide the wiper blade back up so the the hook is latched into place.
Last thing you need to do is simply push the locking tab back down.
And as promised, here’s what you need to do to remove the entire wiper arm from your vehicle if necessary:
If you have a newer Dodge Brand vehicle, you’ll likely have a little plastic cap at the base of the wiper arm. A small flat, tool is all you need to pop it off. This will expose the (most-likely) 15mm-sized socket. Loosen the nut and remove it.
Put two hands on the wiper arm to wiggle it out of place. This may take a few wiggles, especially if you haven’t done it before, but it’ll eventually come out of place very easily! So just keep trying.
Follow the steps we outlined above to swap out the blade. And now you’re ready to put the arm back on the vehicle.
Put the arm back in its socket and take the time to line it up properly to where it needs to sit on the windshield. Pro tip: Most vehicles will have a little line that shows where the blade should sit in the off position. So simply line it up.
Tighten the nut back into its spot, making sure the wiper arm doesn’t move out of place as you do so. Then put the cap back on and you’re done!
0 Comments